Agreement-Based Labeling
- 23 Oct 2023
- 7 Minutes to read
- Print
- DarkLight
- PDF
Agreement-Based Labeling
- Updated on 23 Oct 2023
- 7 Minutes to read
- Print
- DarkLight
- PDF
Article Summary
Share feedback
Thanks for sharing your feedback!
LandingLens offers the ability to create and manage a Label Book. A Label Book is a living document to help guide users on how to properly label various categories of Classes. Now, you be asking:
- How do we measure the consistency of labels across multiple users?
- How do we ensure that only clean, accurate labels will be added to images?
The answer is Agreement-Based Labeling. Agreement-Based Labeling is the concept of allowing multiple users to label the same set of images to analyze the consistency of their labels. This method allows you to identify the areas where users may need more direction with labeling.
For example, let's say you have these Classes for Labelers to choose from:
- Scratch
- Rub Mark
- Crack
Now take a look at the image below. Some Labelers may choose to label the identified area as a Scratch, while others may select Rub Mark or Crack. To help clarify this ambiguity, you can use Agreement-Based Labeling, then update your Label Book accordingly.
.png) Ambiguous Mark to Be Labeled
Ambiguous Mark to Be LabeledNotes:
- Classification projects support Labeling Tasks, but not Agreement-Based Labeling.
- Agreement-Based Labeling is not applicable to Visual Prompting.
Agreement-Based Labeling Workflow
This is how Agreement-Based Labeling works:
- Send a Labeling Task to two or three users. This allows multiple users to label the same sets of images.
- After the images have been labeled, LandingLens:
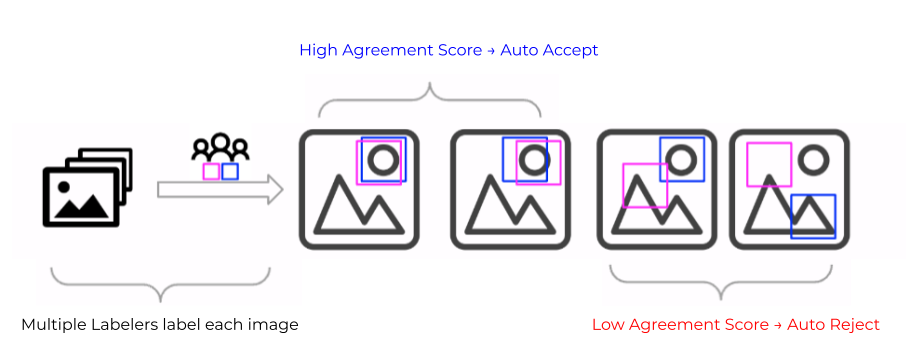
- Calculates the similarities between the labels. This calculation is called the Agreement Score.
- Ranks the images by Agreement Score, from lowest (least agreed and most confusion) to highest (most agreed and least confusion).
- You can then review the labels and accept or reject them. When you reject a label, you can provide feedback to the Labeler. To prevent issues in the future, add clarifying information to the Label Book.
 Achieve Accurate Labeling with Agreement-Based Labeling

Labeling Tasks
Let's say you labeled some images, and you want to compare your findings with another user. To do this, you can send a Labeling Task to that user.
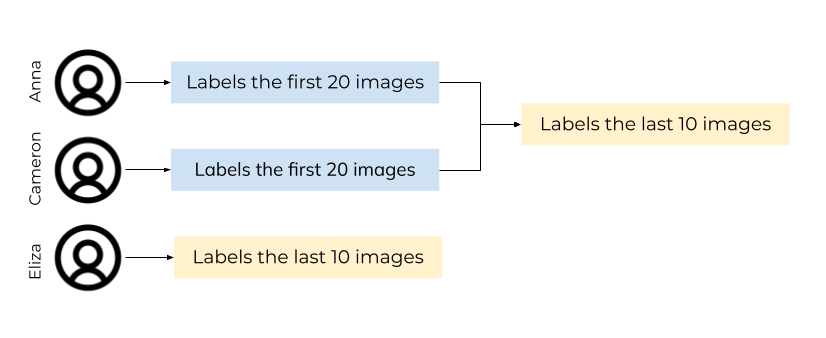
LandingLens sends images in batches of 20 until all images have been reviewed by the required number of Labelers. However, if you send a Labeling Task with fewer than 20 images, LandingLens automatically divides those images into smaller batches. Let's explore how LandingLens sends images in an example.
Let's say you create a Labeling Task with these settings:
- The Labeling Task has 30 images.
- Two Labelers are required to label each image.
You then send the Labeling Task to these three Labelers: Anna, Cameron, and Eliza. The following steps will occur:
- LandingLens divides the 30 images into two batches:
- Batch One: Includes the first 20 images
- Batch Two: Includes the remaining 10 images
- LandingLens sends Batch One to two of the Labelers. (Let's say, Anna and Cameron.)
- Since two Labelers are required to label each image, the first person to complete their labels will be sent Batch Two. For example, if Cameron finishes labeling Batch One before Anna, then he will be sent Batch Two.
- LandingLens sends Batch Two to the third Labeler. (In this case, Eliza.)
 LandingLens Sends Images in Batches Until All Images Have Been Reviewed by the Required Number of Labelers

Notes:
- You can only send Labeling Tasks to Members who have been invited to your Project.
- One set of images can only be added to one Labeling Task at a time; you cannot have the same set of images in multiple Labeling Tasks.
Send Labeling Tasks
- Open the Project.
- Select the images you labeled.
- Click Options in the action bar near the bottom of the screen and select Create Labeling Task. (You may need to scroll to see this option.)
.png) Create Labeling Task
Create Labeling Task - Enter a brief, descriptive name for the Labeling Task in the Task Name field.
- Select how many Labelers you want to label the images from the drop-down menu. For example, if you want two Labelers to label images, select 2.
- If you've already labeled some images, you can choose whether to display (carry over) those existing labels. Select No to remove the labels, or select Yes to display the labels.
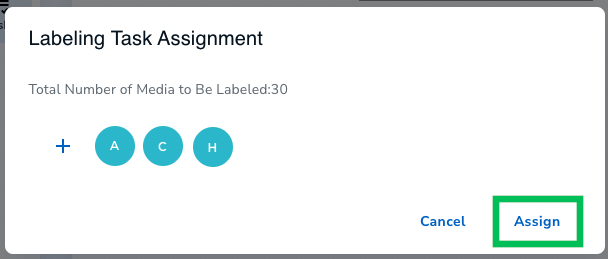
- Select the Labelers you want to send a Labeling Task to from the Assign Labelers drop-down menu. To add multiple users, click the + icon.
- Click Create Task. An email is sent to the Labelers, notifying them of the task.
.png) Create a Labeling Task
Create a Labeling Task
.png)
.png)
Events That Occur After Labeling Tasks Are Sent
After a Labeling Task is sent, these events occur:
- The New Labeling Task email is sent to the Labeler. This email includes a link to the requested images.
- Images in a Labeling Task have the status In Task.
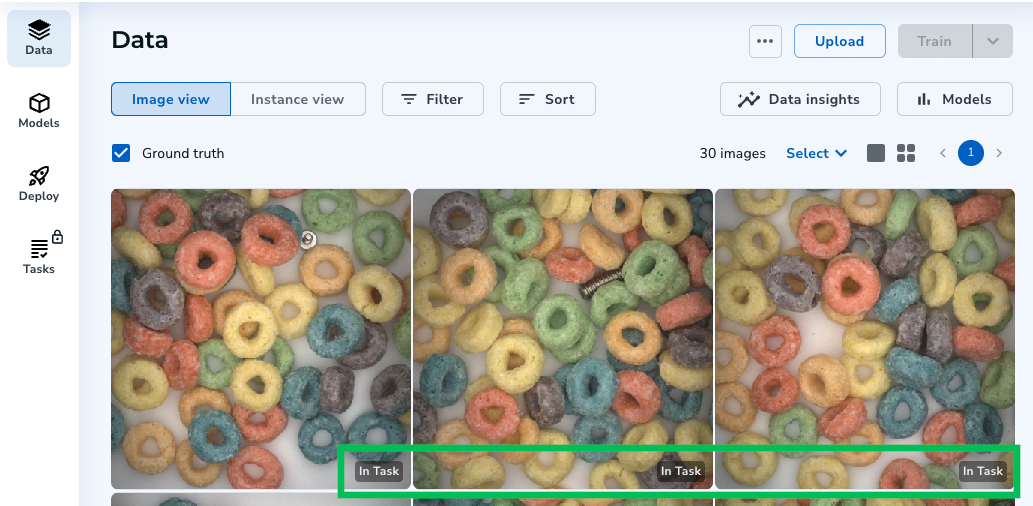 The "In Task" Status Displays for Images in a Labeling Task
 - Images in a Labeling Task can only be labeled by the requested Labelers. (The requested Labelers can only label images using the link from the New Labeling Task email.)
.png) Images Can Only Be Labeled by the Requested Labeler
Images Can Only Be Labeled by the Requested Labeler

.png)
Labeling Tasks for Segmentation Projects
Labeling Tasks in Segmentation Projects are assigned to users in batches of five images. For example, if you create a Labeling Task with 10 images and assign it to a user, that user will get two batches of five images each.
 Labeling Tasks Are Grouped into Batches of Five Images
When the user opens a Labeling Task, they will see five images. When they submit that batch, the second batch of five images becomes available.
 When You Finish a Batch, LandingLens Gives You the Next One
Limiting each batch to five images allows LandingLens to process each batch quickly.
Assign Additional Users to Labeling Tasks
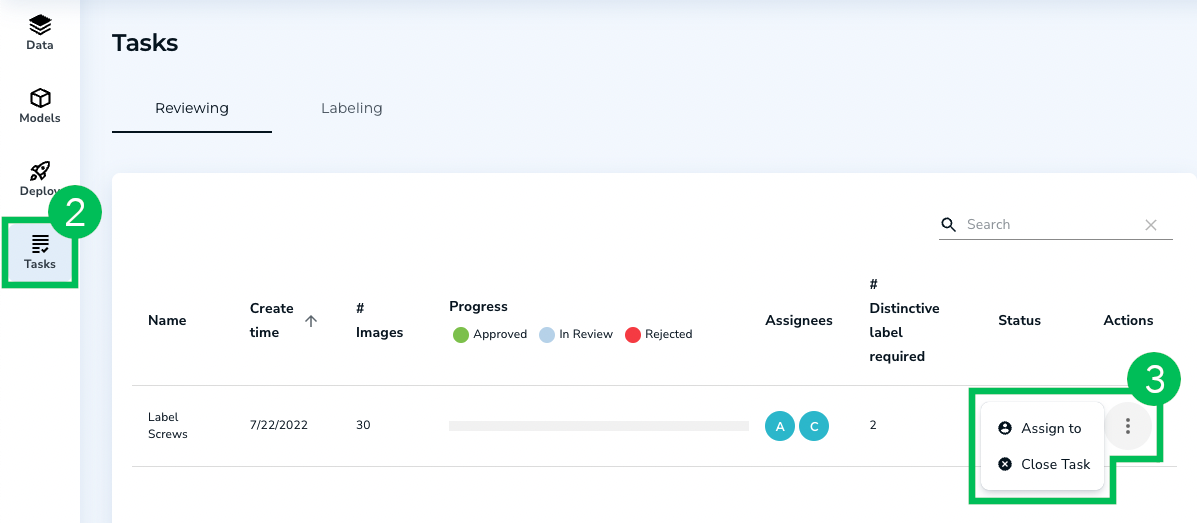
- Open the Project.
- Click Tasks in the left side panel.
- On the Reviewing tab, click the vertical ellipses button and select Assign To.
.png) Assign To
Assign To - Click the + icon.
.png) Add a User
Add a User - Enter the name of the user you want to assign the Labeling Task to. (Remember, you can only invite users who have been invited to your Project.)
- Click Assign.
 Assign Another User to a Labeling Task
Close Labeling Tasks
You can close a Labeling Task before it has been completed. For example, if an assigned Labeler is unable to complete a Labeling Task, you can close it.
To close a Labeling Task:
- Open the Project that has the Labeling Task you want to close.
- Click Tasks in the left side panel.
- On the Reviewing tab, click the vertical ellipses button and select Assign To.
 Close Task
 - Click Yes in the pop-up window to confirm your action.
.png)
.png)


View and Submit Labeling Tasks
If a user has sent you a Labeling Task, you will receive the New Labeling Task email.
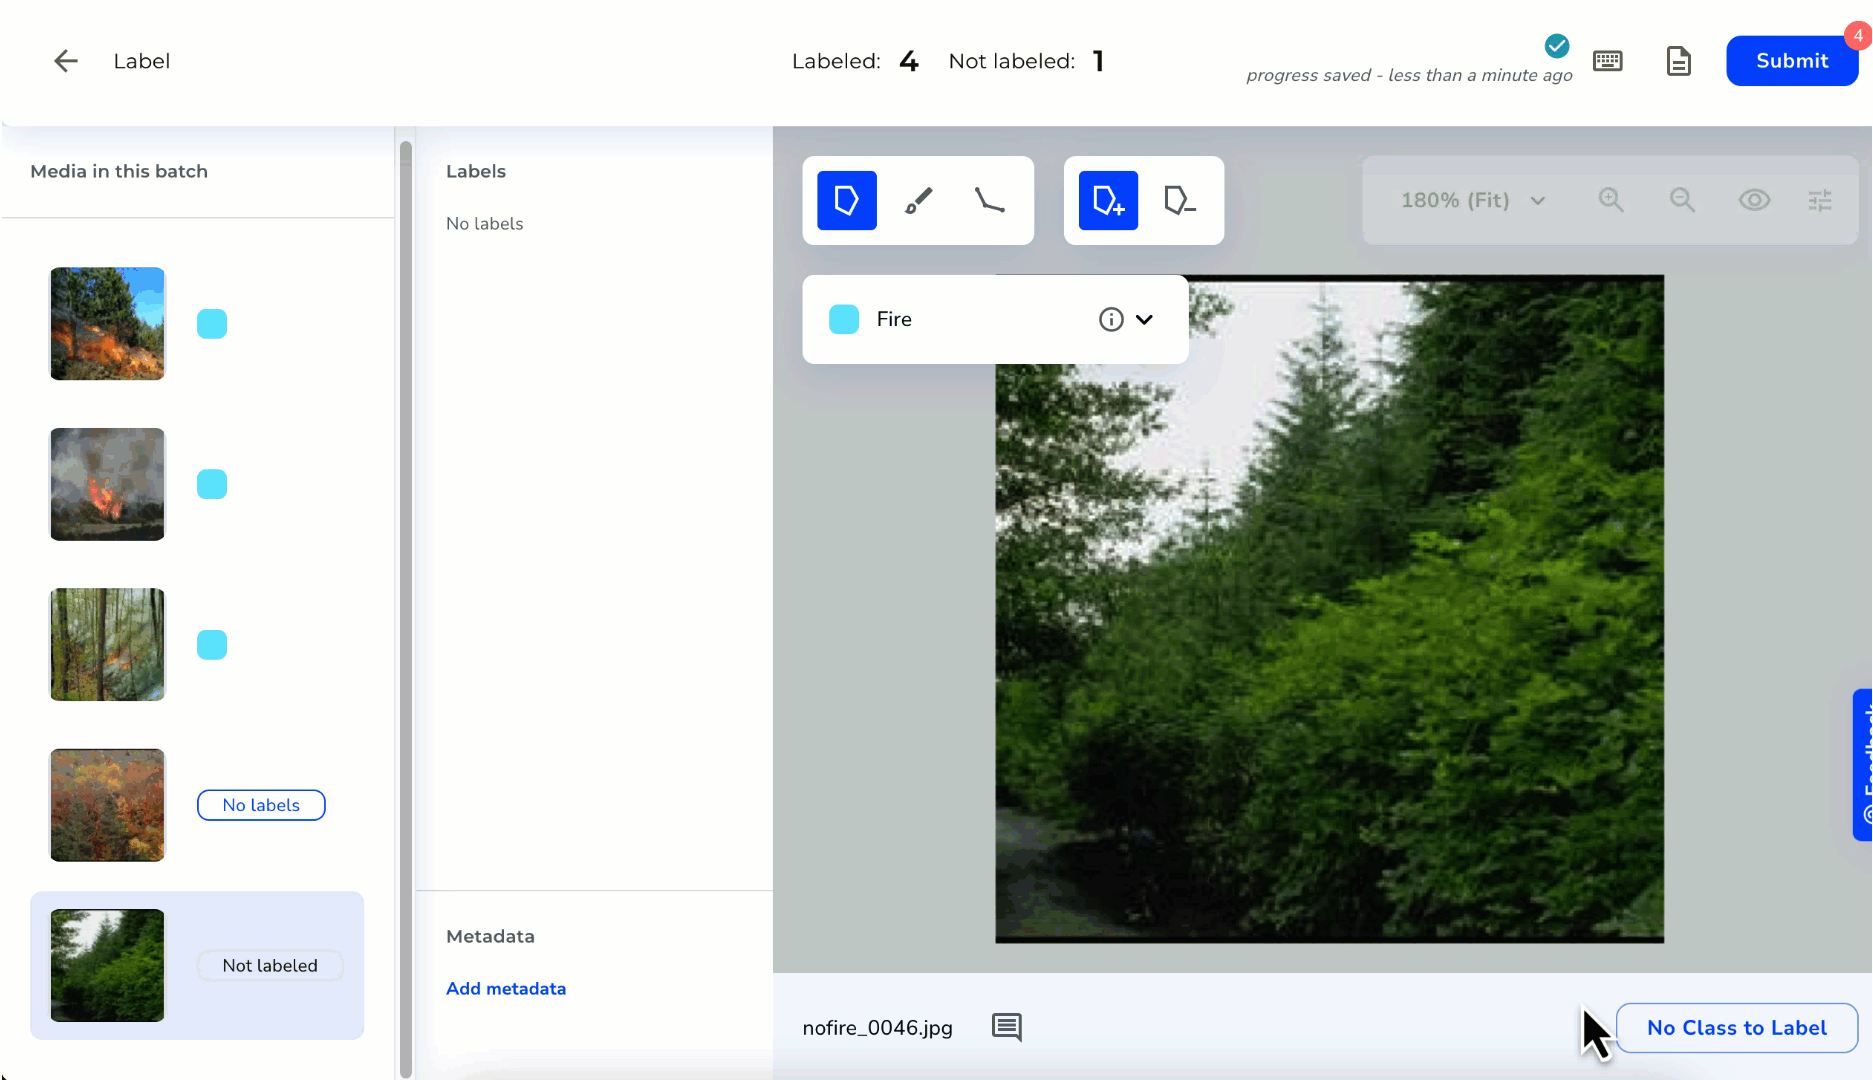
To view an assigned Labeling Task:
- Click the link in the New Labeling Task email.
- The task opens. Label the images.
- After you've labeled all images, click Submit to share your labels.
.png) Submit a Labeling Task
Submit a Labeling Task
.png)
Review Submitted Labeling Tasks
After all the Labelers have submitted their Labeling Task, you will receive the Task [#] Has Labels Ready for Your Review email. This email includes a link to the labeled images. Click this link to compare the labels. You can also click the Review button on the Tasks page to compare the labels.
.png) Review a Labeling Task
Review a Labeling Task The Review Task page with the labeled images will display. This page includes several settings to help you review the labels. The table below describes these settings.
 Review Task Settings
 | Number | Settings | Description |
|---|---|---|
| 1 | Review Metrics |
|
| 2 | Hot Keys / Label Book / Submit |
|
| 3 | Agreement Threshold | By default, LandingLens calculates the similarities between all labels. This calculation is called the Agreement Score. The platform determines the Agreement Score based on the overlap of the Labelers' labels. For example, if the labels overlap by 50%, then the Agreement Score will be .50. Note: If there is only one Labeler assigned to a task, you will not see the Agreement Threshold. You can adjust the required Agreement Score that images must have by changing the Agreement Threshold. For example, let's say the Agreement Threshold is set to .80. This means that the Labelers' labels must overlap by 80% to be approved. Note: A high Agreement Score does not necessarily mean that the labels are correct. It is still recommended to review these labels. |
| 4 | Image Agreement | The Agreement Score for the opened image. |
| 5 | Settings | The Settings icon allows you to adjust the brightness and contrast of the image. This allows you to brighten images that were taken at night, for example. |
| 6 | Labelers' Labels | By default, the labels of all Labelers display on the image. You can select a Labeler to see their label only. This is useful if you want to accept the labels of a single Labeler. |
| 7 | Agreement Sort | By default, images are sorted by Agreement Score, from lowest (least agreed and most confusion) to highest (most agreed and least confusion). You can click the Agreement arrow to sort from the highest to lowest Agreement Score instead. |
| 8 | Action buttons |
|
Was this article helpful?