Segmentation
- 20 Dec 2022
- 2 Minutes to read
- Print
- DarkLight
- PDF
Segmentation
- Updated on 20 Dec 2022
- 2 Minutes to read
- Print
- DarkLight
- PDF
Article Summary
Share feedback
Thanks for sharing your feedback!
Overview
Segmentation is used to identify objects with great precision. This is done by using pen-like tools to mark the exact location of a region. Using this method takes more time to label objects. So why choose Segmentation? Let’s explore this answer in an example.
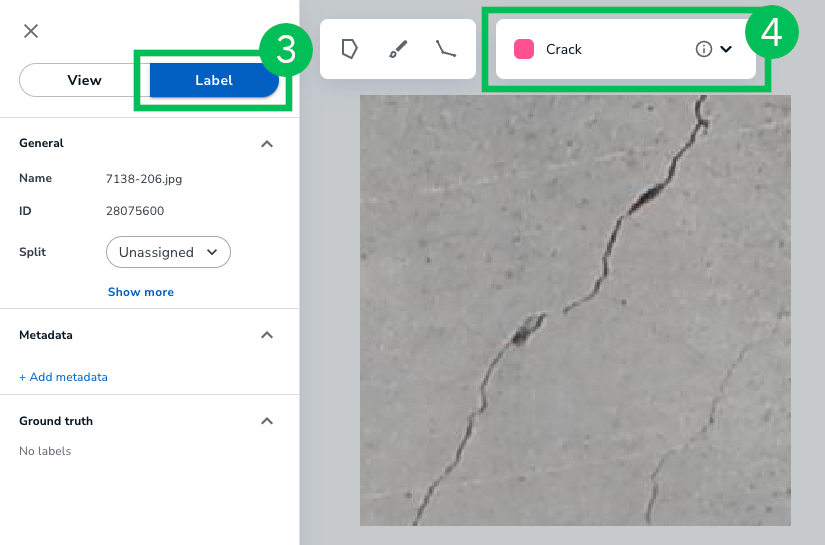
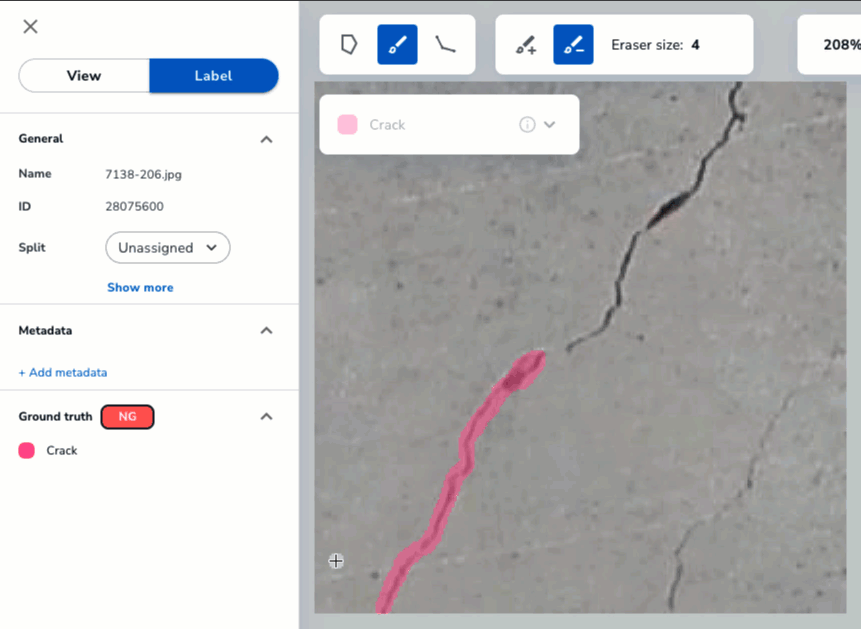
Let’s say you want to identify cracks in the cement. You could use Object Detection. However, bounding boxes would include too much non-defective space (or space that you do not want to include in your label). Remember, when you include non-defective space in your label, you tell the platform that this extra space is part of the defect (or object). Consider the screenshots below where the user is trying to identify a crack with Object Detection and Segmentation. Which would you choose?
 Bounding Boxes to Detect Cracks in Cement
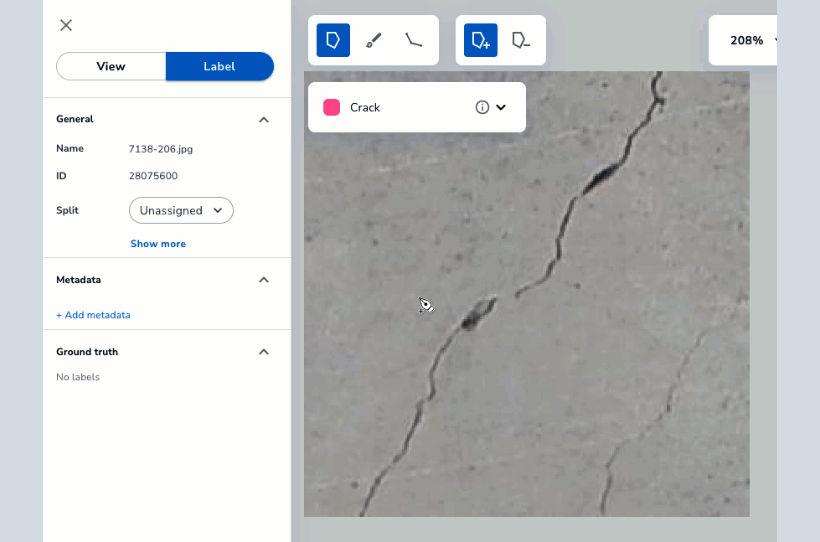
  Segmentation to Detect Cracks in Cement
Segmentation Tools
Segmentation offers these tools to help detect objects:
- Polygons: Create a shape to fill the object you want to detect.
- Brushes: "Paint" over the object you want to detect.
- Polylines: Create lines over the object you want to detect.
Tip:
Use the Brush to erase excess lines.
Label with Polygons
- Open the Project you want to edit.
- Open the image you want to label.
- Click the Label tab.
- Select the Class you want to label from the drop-down menu.
 Class on the Label Tab
 - Click the Polygon icon. (You can also press P on your keyboard.)
- The Draw icon is auto-selected. Keep this setting.
 Polygon Icon
 - Click where you want to start your shape. A blue circle displays, indicating the start of the shape.
- Click to continue creating your shape.
- Complete your shape by clicking the blue circle. The shape automatically fills with the color of the Class.
 Create Shapes with the Polygon Tool


Label with Brushes
- Open the Project you want to edit.
- Open the image you want to label.
- Click the Label tab.
- Select the Class you want to label from the drop-down menu.Class on the Label Tab
- Click the Brush icon. (You can also press B on your keyboard.)
- By default, the Draw icon is auto-selected. Keep this setting.
- Adjust the size of the line width accordingly.
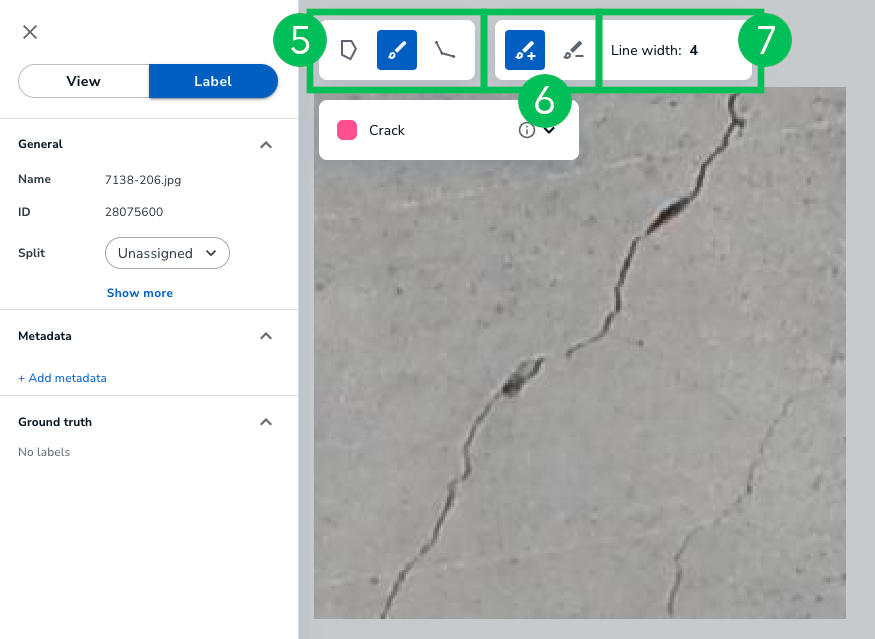 Configure the Brush Settings
 - Click and drag your cursor over the area you want to identify.
- Release the mouse to complete your edits.
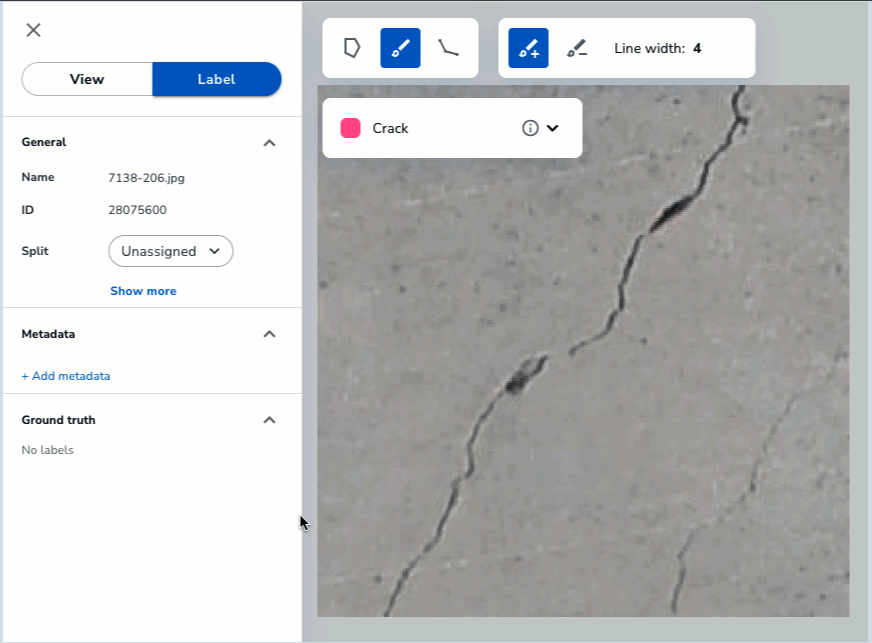 Label with the Brush Tool


Remove Excess Labels with Brushes
Note:
You can also remove excess labels with Polygons. This process is similar to the procedure in this section. For more information on how to use the Polygon tool, go here.
To remove excess labels with a Brush:
- Open the Project you want to edit.
- Open the image you want to label.
- Click the Label tab.
- Click the Brush icon. (You can also press B on your keyboard.)
- Click the Erase icon. (You can also press E on your keyboard.)
- Adjust the size of the eraser accordingly.
 Configure the Eraser Settings
 - Click and drag your cursor over the area you want to remove.
- Release the mouse to complete your edits.
 Erase Excess Lines


Label with Polylines
- Open the Project you want to edit.
- Open the image you want to label.
- Click the Label tab.
- Select the Class you want to label from the drop-down menu.Class on the Label Tab
- Click the Polyline icon. (You can also press L on your keyboard.)
- Adjust the size of the line width accordingly.
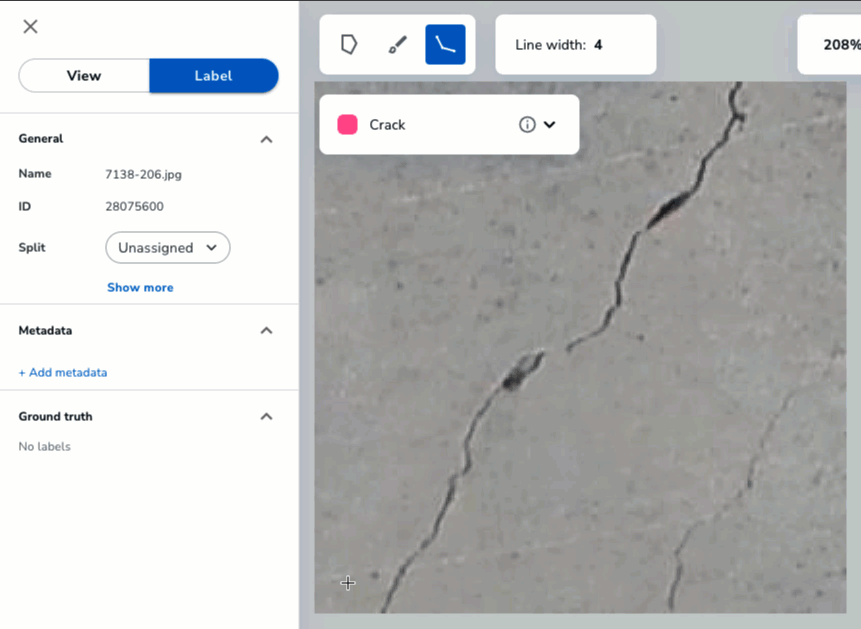
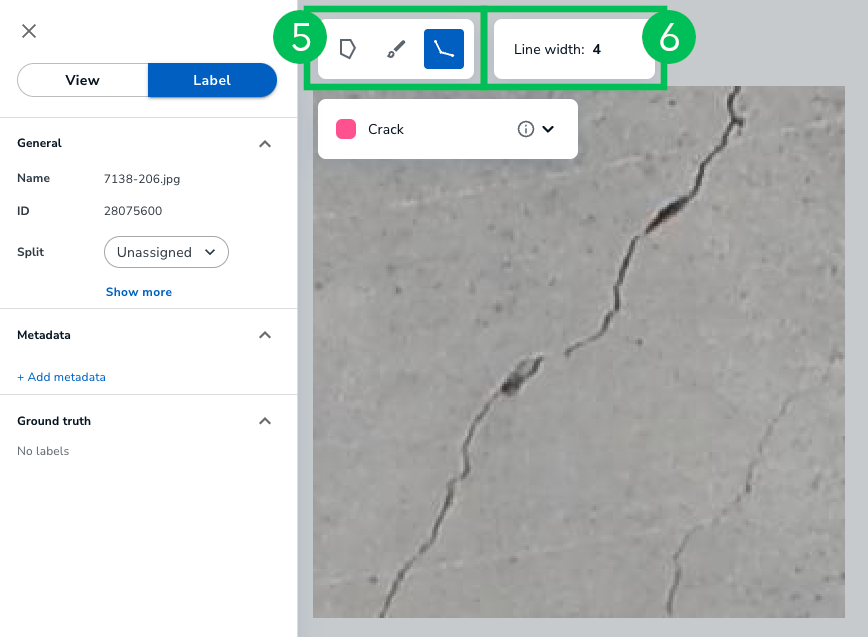 Configure the Polyline Settings
 - Click where you want to start your line.
- Click to change the direction of your line.
- Press Enter on your keyboard to complete your edits.
 Create Lines with the Polyline Tool


Was this article helpful?